Author: Bethany

  • Walk on the Beach Cardi Design

    Walk on the Beach Cardi Design

    It’s officially the first weekend of spring! Hallelujah! Although, it’s not quite feeling like spring. We are getting our third winter storm of March this weekend. It’s crazy. Our sixth month of winter weather. And April will most likely still be winter. At this point, I really am feeling a little bit like I need out of this state.

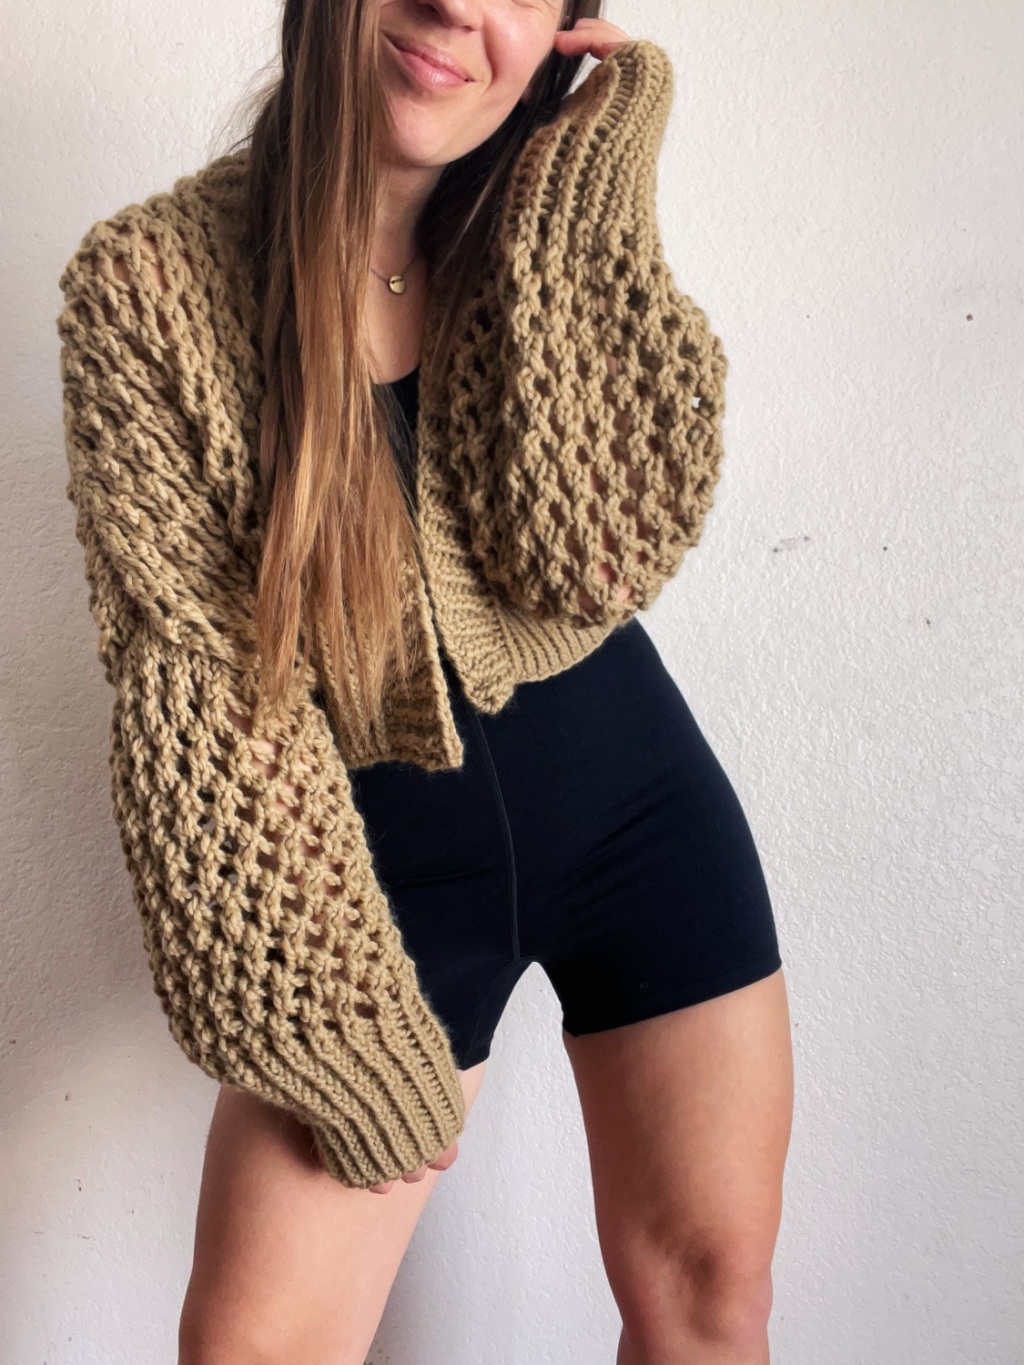
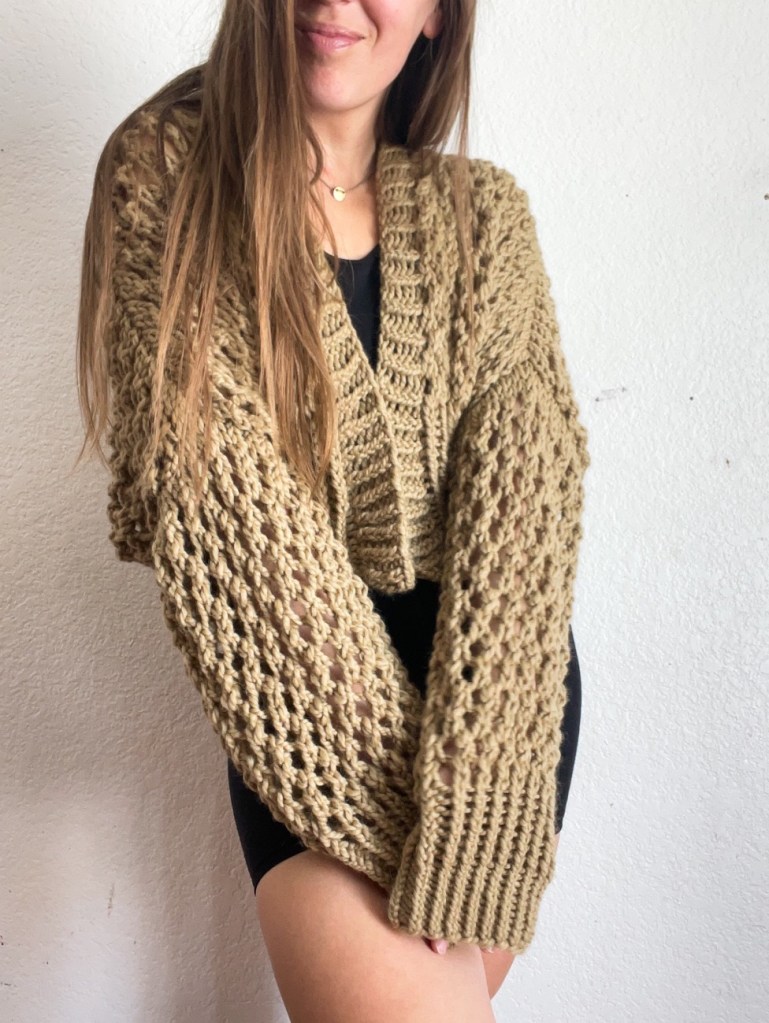
    On the plus side, I have my two florida trips this month and thank goodness for that! I worked up this latest design over the last two weeks in preparation for the first trip.

    I used the alpachino merino wool yarn from Wool and the Gang for this one, it’s so cuddly. I love it. I used this yarn also for my Bring me coffee cardi pattern and it’s held up incredibly, especially being it’s my most worn cardigan!

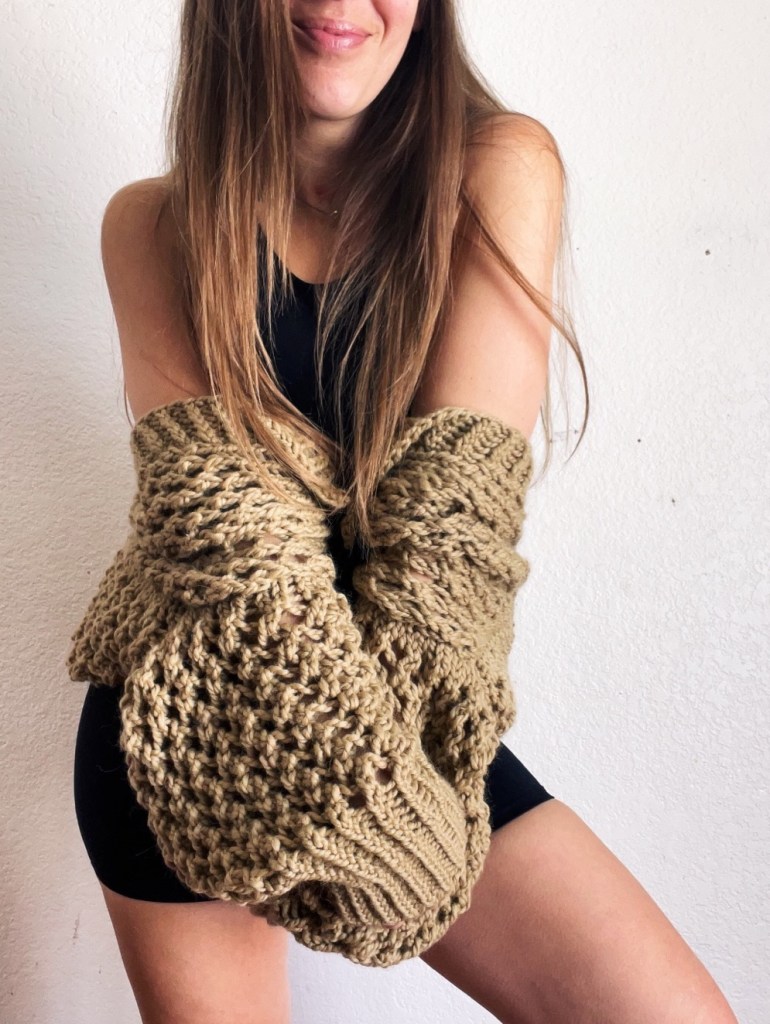
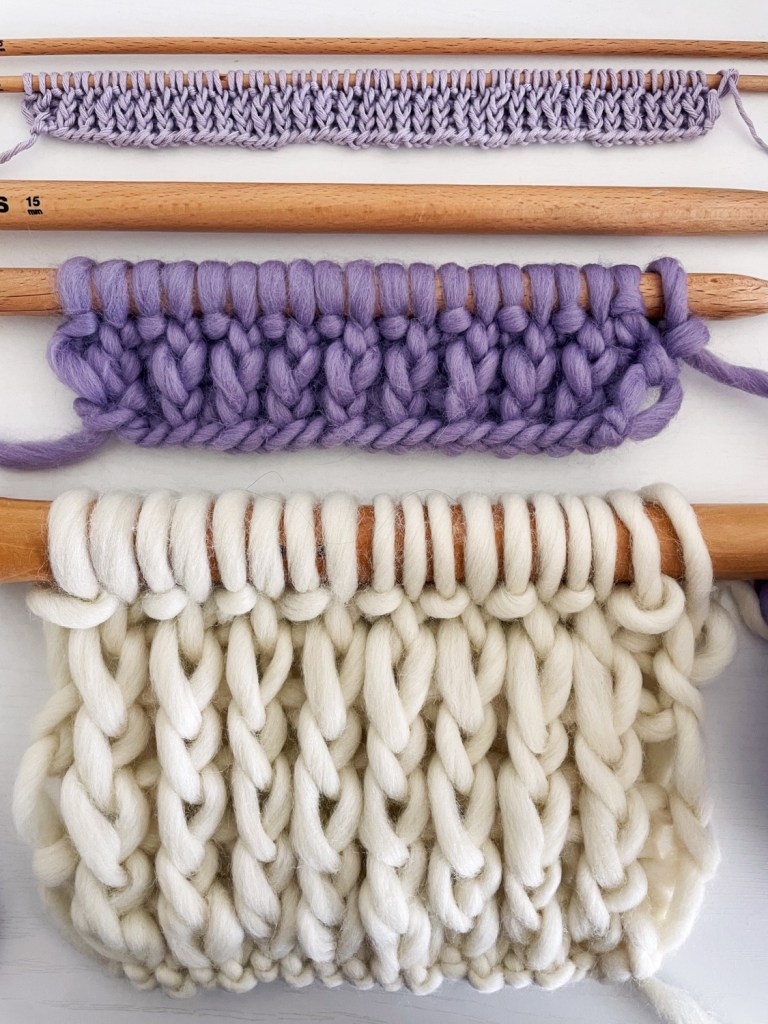
    I worked this up all in a 1×1 twisted rib stitch and mesh stitch. Mesh stitch is so awesome for spring and summer knits as it’s open and airy. It’s perfect for using for a more chunky weight yarn where you want to have a little warmth, but also not too warm. This yarn and this stitch balance each other out so well.

    I used two sizes of straight needles for this design. A 8mm and 12mm (12 US and 17 US) and 5 skeins of the Alpachino merino yarn. I did include sizing edits for a smaller and larger fit in the pattern as well!

    Knitting skills needed are longtail cast on, twisted rib stitch, yarn over, knit two stitches together, picking up stitches, bind off, and seaming.

    Purchase the Walk on the Beach Cardi here! Or by selecting the shop button on the menu above.

    ☀️ Bethany

  • The Forever One Tank Design

    The Forever One Tank Design

    Hey guys!

    Happy March! It’s so thrilling we are nearing the end of winter! Spring and summer are just around the corner, and I am more than ready for all the warmer weather knits!

    Don’t get me wrong, winter knits are awesome too, but I barely leave the house in winter, so there’s no dressing up in them or anything! Now spring and summer, I am all about being outside again. Soaking up the sun rays that you can actually feel, enjoying strolls with an iced coffee in hand, evenings on the patio. It’s heaven.

    I also have a couple florida trips coming up and this tank top is going right into my suitcase! I can’t wait to wear it in the evenings after enjoying the beach and adventuring all day. It’s a perfect evening out top!

    This pattern is suitable for beginners as long as you have basic knitting skills! The only thing that’s a little extra is picking up stitches. Otherwise, you totally got this! Materials wise, you’re only needing 2 skeins of “the cotton” from We Are Knitters (I used about 1.25 skeins) and then two accent colors for some edging on the shoulder. Needles are size 5mm (US 8) and roughly 16″ length. But they can def be shorter as well. And that’s about it!

    Can’t wait to see what color you make yours!

  • Twisted Rib Stitch

    Twisted Rib Stitch

    I’ve finally gotten around to getting my first little tutorial video up on YouTube! I can’t count the amount of times over the years that people have asked me how I do the twisted rib stitch in my patterns.

    It seems that a lot of the videos you guys find instruct how to work it in different ways and there’s a little confusion on how I do it.

    I haven’t actually ever searched it myself, but learned to do it from a wool and the gang pattern I did when I first started knitting.

    It is a very simple stitch. You’ll just be knitting and purling through the back loops. That’s it! For 1×1 twisted rib, you’ll knit and purl from the back loops, alternating knit and purl. For 2×2 twisted rib, you’ll do the same thing except work two knit stitches through the back loops, followed by two purl stitches through the back loops.

    I use twisted rib stitch in nearly all of my patterns! My winter magic sweater pattern is worked in all twisted rib, with different needle sizes for the waistband, wrists, and turtleneck part. It’s a fun one to do if you want to get better with working twisted rib!

    You’ll want to make sure that you’re knitting the knit stitches and purling the purl stitches for each row of twisted ribbing. Otherwise you will end up with what looks like almost a twisted moss stitch. Which actually looks pretty cool! Someone had accidentally done that and sent me a photo of it.

    If you’re knitting and purling through the back loops, you’re doing it right!:)